Introduction
This guide explains how to use our ClassMakr plugin to create online classes and lessons for users to purchase and live interactive lessons..
Once ClassMakr is installed and activated, refer to this guide for help configuring and managing the plugin. Use the Index on the left to quickly locate usage guidance on specific features.
The plugin has some default features where on activation some pages get created by default. They include the User Registration Page, The User Login Page, The User Dashboard Page, and a Bundle Page where you can sell multiple classes altogether.
If you haven’t installed ClassMakr, then visit the ClassMakr Pro page where you can explore the plugin’s many features and sign up for the hosting services or purchase the developer package or try out our free version.
Requirements
We highly recommend running the latest version of WordPress. The minimum requirement is version 4.7. Make sure that your server meets the minimum requirements to run WordPress as well.
1.1 Classes
The classes area is where you can create, edit, and set classes for your site. These classes will have lessons associated with them.they will be listed for selling in the future in your platform.
1.1.1 Create a class

The classes area has this form for you to create a new class. Here you will find a bunch of options and fields to personalize your class and set up your online service in no time. The options include setting up the kind of questionnaire associated with your class for the future. Adding a featured image that will represent the class on the site. Setting up an introductory video for your class. You can even change the thumbnail of this video or if you don't have one you can simply continue using the default one provided by us.
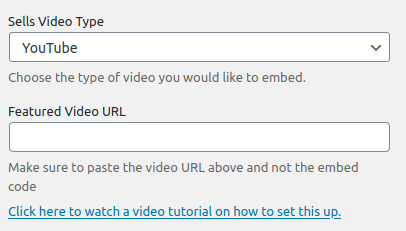
You can add videos through & different platforms that include Youtube, Vimeo, Wistia, Google Drive, DropBox, Amazon S3. If you need some more help with setting the videos no problem. Just click on the link below to watch a video tutorial on how to set your videos for your classes.
For ClassMakr pro, you will enjoy other benefits such as selling your classes as subscriptions for monthly, yearly intervals, or just charge them only once for your class. You can even make these classes available for free if you want.
Here you can set up different payment options for the class that you will be creating.For all the subscribtion based classes Stripe will available for managing the payments.Here you can also provide your users trial based subscriptions.


Depending on the different packages thera are limitations to how many classes can be made and the numbers of lessons in total that can be created over the platform.
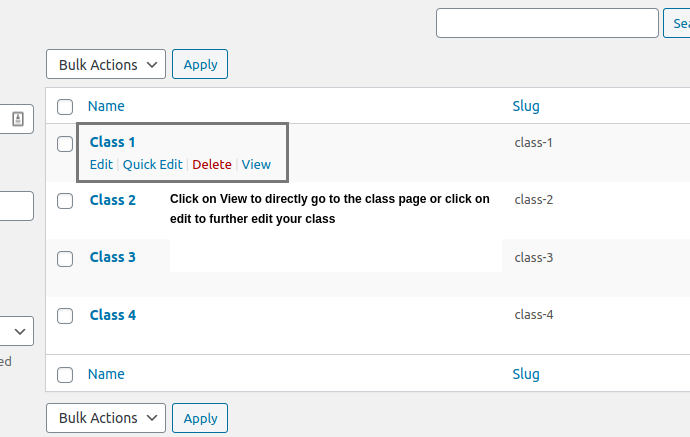
1.1.2 Edit a class
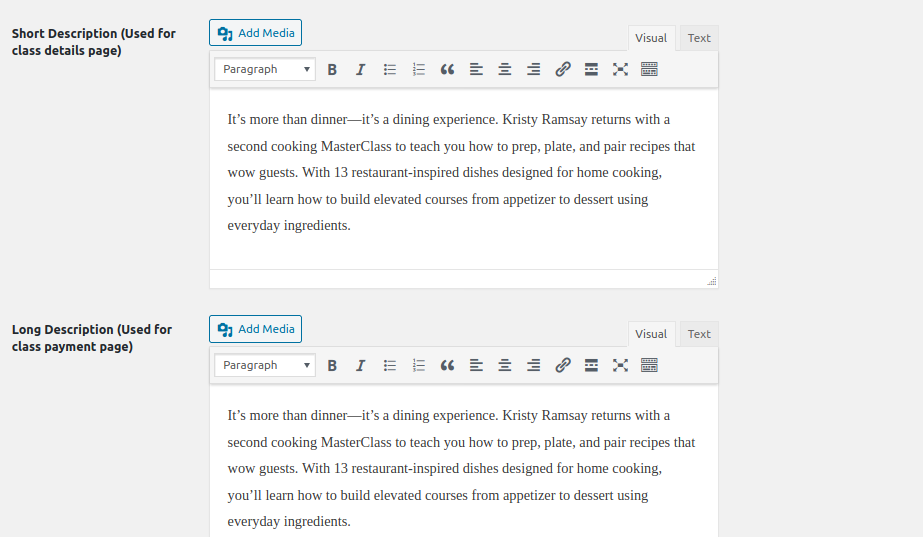
After you have successfully created a class you can now edit a class if you want to modify, add, or remove any details that you want. You can even add a description to your content for the class display page and a short description for the checkout page for your class.
Description - On the class edit page you will find two extra fields. These fields are there so you can add a description for your class that gets displayed on the class page and a small description for the checkout page.
Recommended Class -Here you can also add some other classes as recommendations to upsell or promote them.

1.2 Lessons
The lessons area allows you to add lessons and assign them to the classes, add description documents, questionnaire, video tutorials, and even go live.
1.2.1 Lesson Fields
- Title – The name of the lesson.
- Draft/Published – The lessons’ current status. Draft lessons are not available to the public until they have been published. Users who have not signed for the lesson will not have access to the lesson.
- Description – The content for the lesson.
- Class – Assign a class to the lesson so that they can appear on the class display page and be sold through the class.
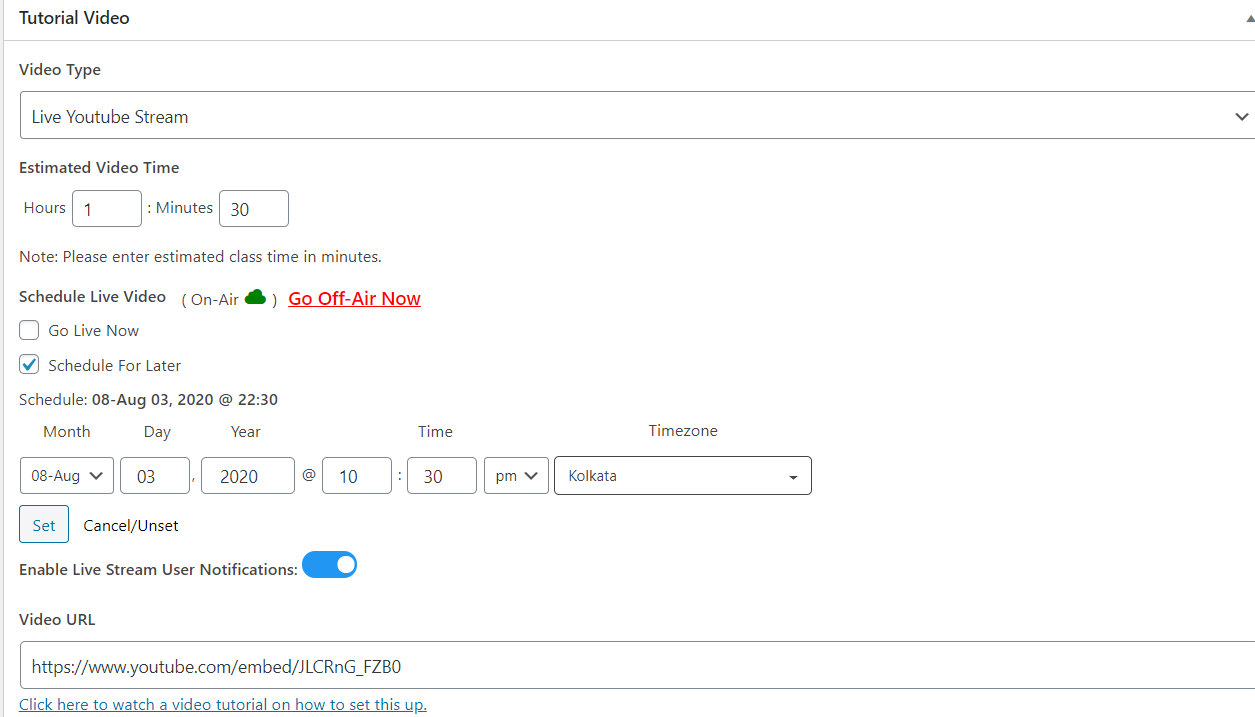
Tutorial Video – You can add videos through & different platforms that include Youtube, Vimeo, Wistia, Google Drive, DropBox, Amazon S3. You can also change the thumbnail for the video or simply use our default one.

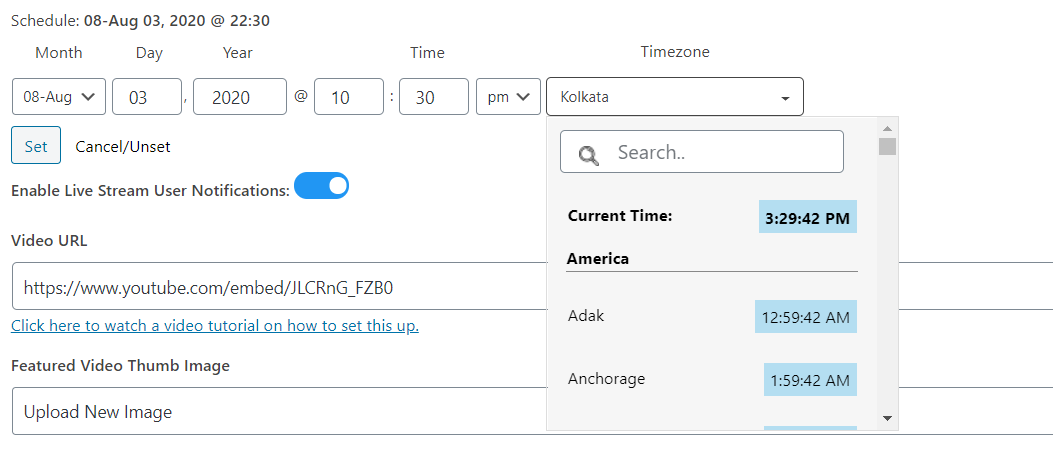
Live Tutorial Video – There is an option in the tutorial video is called Live Youtube Stream where you can use the youtube go-live feature to directly stream that live video her on your site. You can schedule this stream to let your users know the time. This scheduled time will be available on the lesson page. Or simply Go live at that very moment. During Live Stream you will also enjoy the added benefit of Live Chat Stream
For Youtube Live Stream you can also set the desired timezone according to which you want to go live.
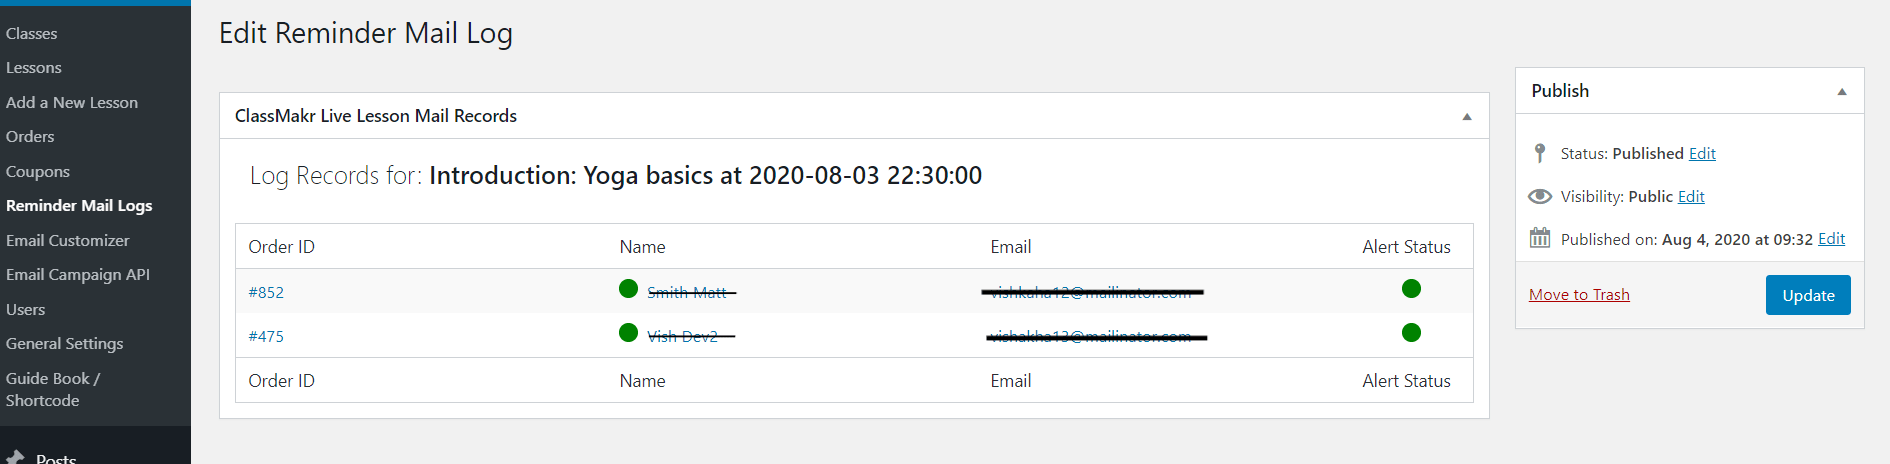
There is an added feature of sending user notifications about the live stream.Users will get a reminder mail 15 minutes prior to the lesson.You can enable/disable this feature according to your requirements.These reminders are also recorded in logs that you can see in the admin side.
Upload Supportive Documents – You can add images files to support your lesson as well.
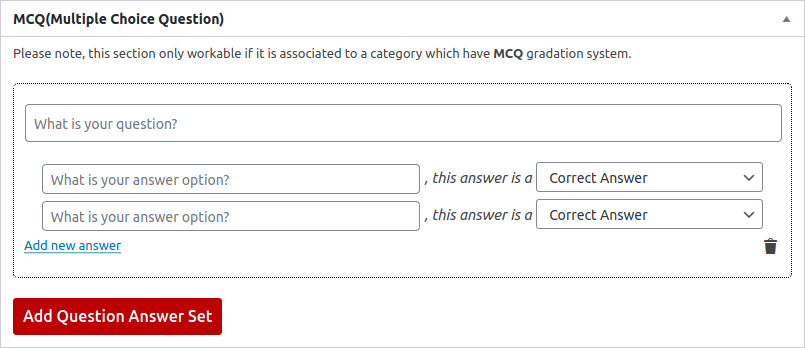
Multiple Choice Questions – You can add MCQ questions but please keep in mind this feature will only work if you have assigned a class that has MCQ questions set there as the mode of class-related questions.
1.2.2 Lesson Behaviour
The Lesson Display Page will have some added elements such as a floating navigation menu to display the lessons associated with it. A paginated link to the next lesson in the queue, the questions, documents live chat, etc.
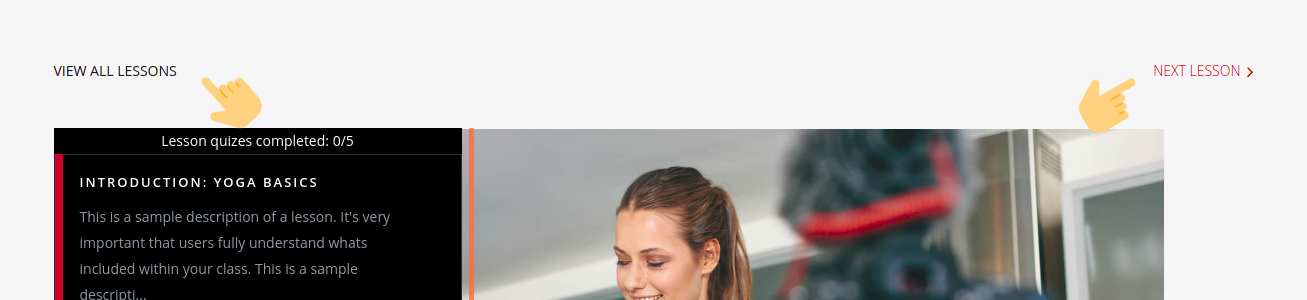
This displays a glimpse of the floating navigation menu and the paginated link to the next lesson in the queue
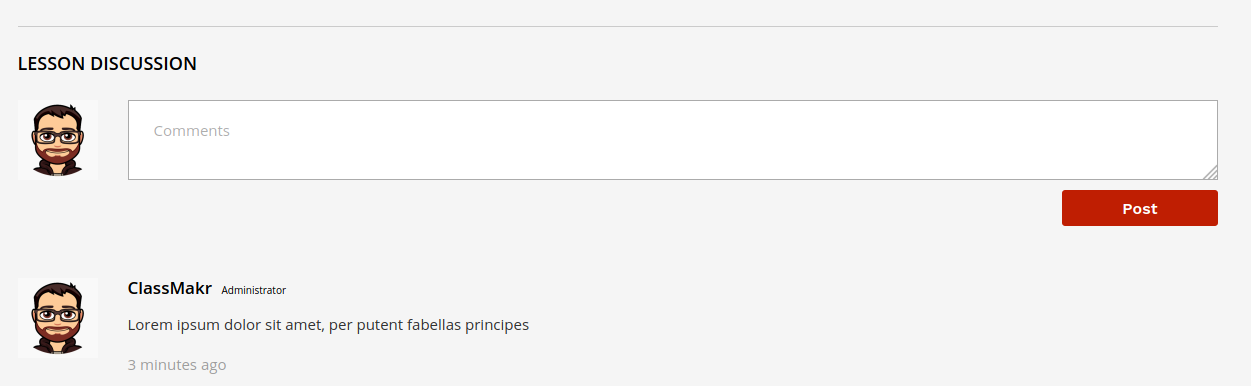
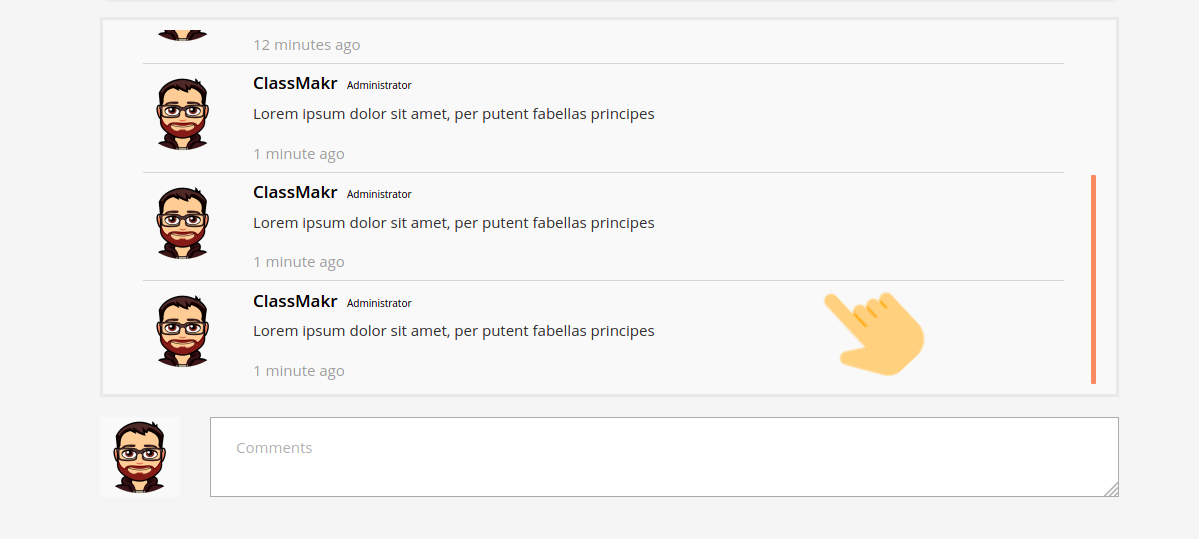
This displays a normal comment section when the lessons are not running on live mode.
The above shows the live chat system that is available when the lesson is On air with youtube live stream as the tutorial video.
1.2.3 Lesson Features
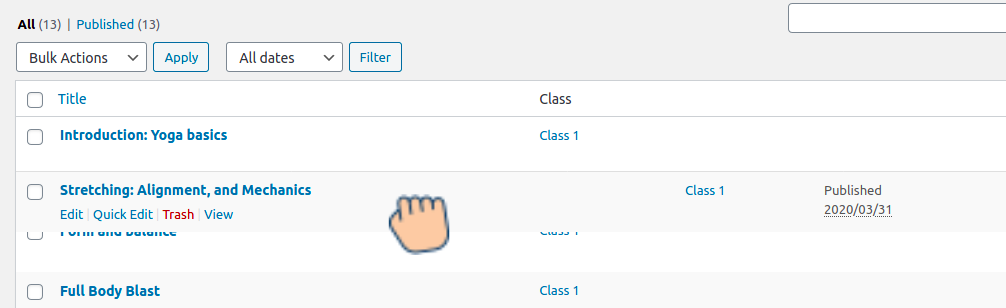
Rearrange Lessons – You can also drag and rearrange lessons in the order that you want to display them.
1.3 Orders
1.3.1 How to Order
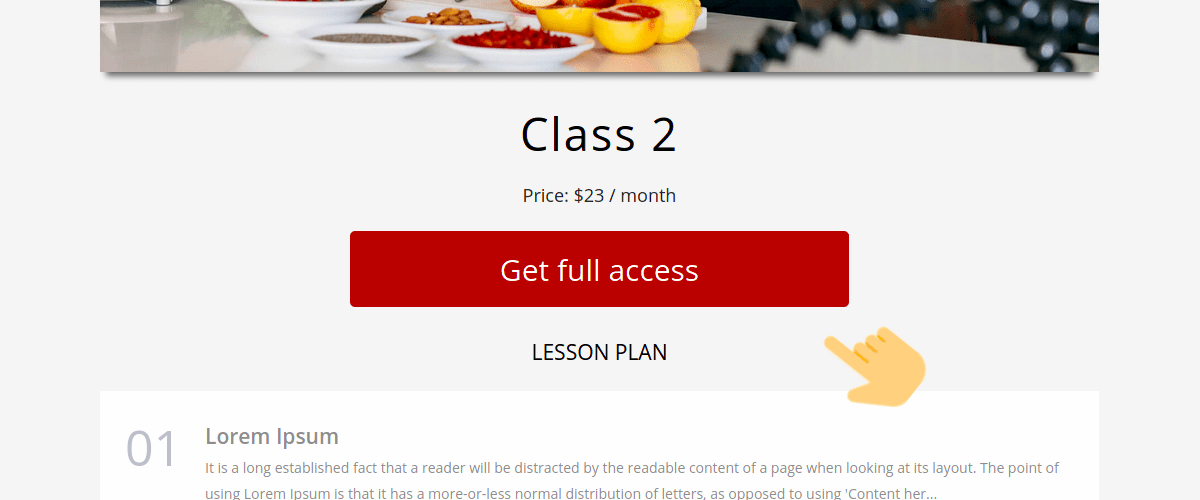
Go to the Class Page where there is a button to order the class.
You can also click on the lesson title on the class page to go to the checkout page where you can buy the product
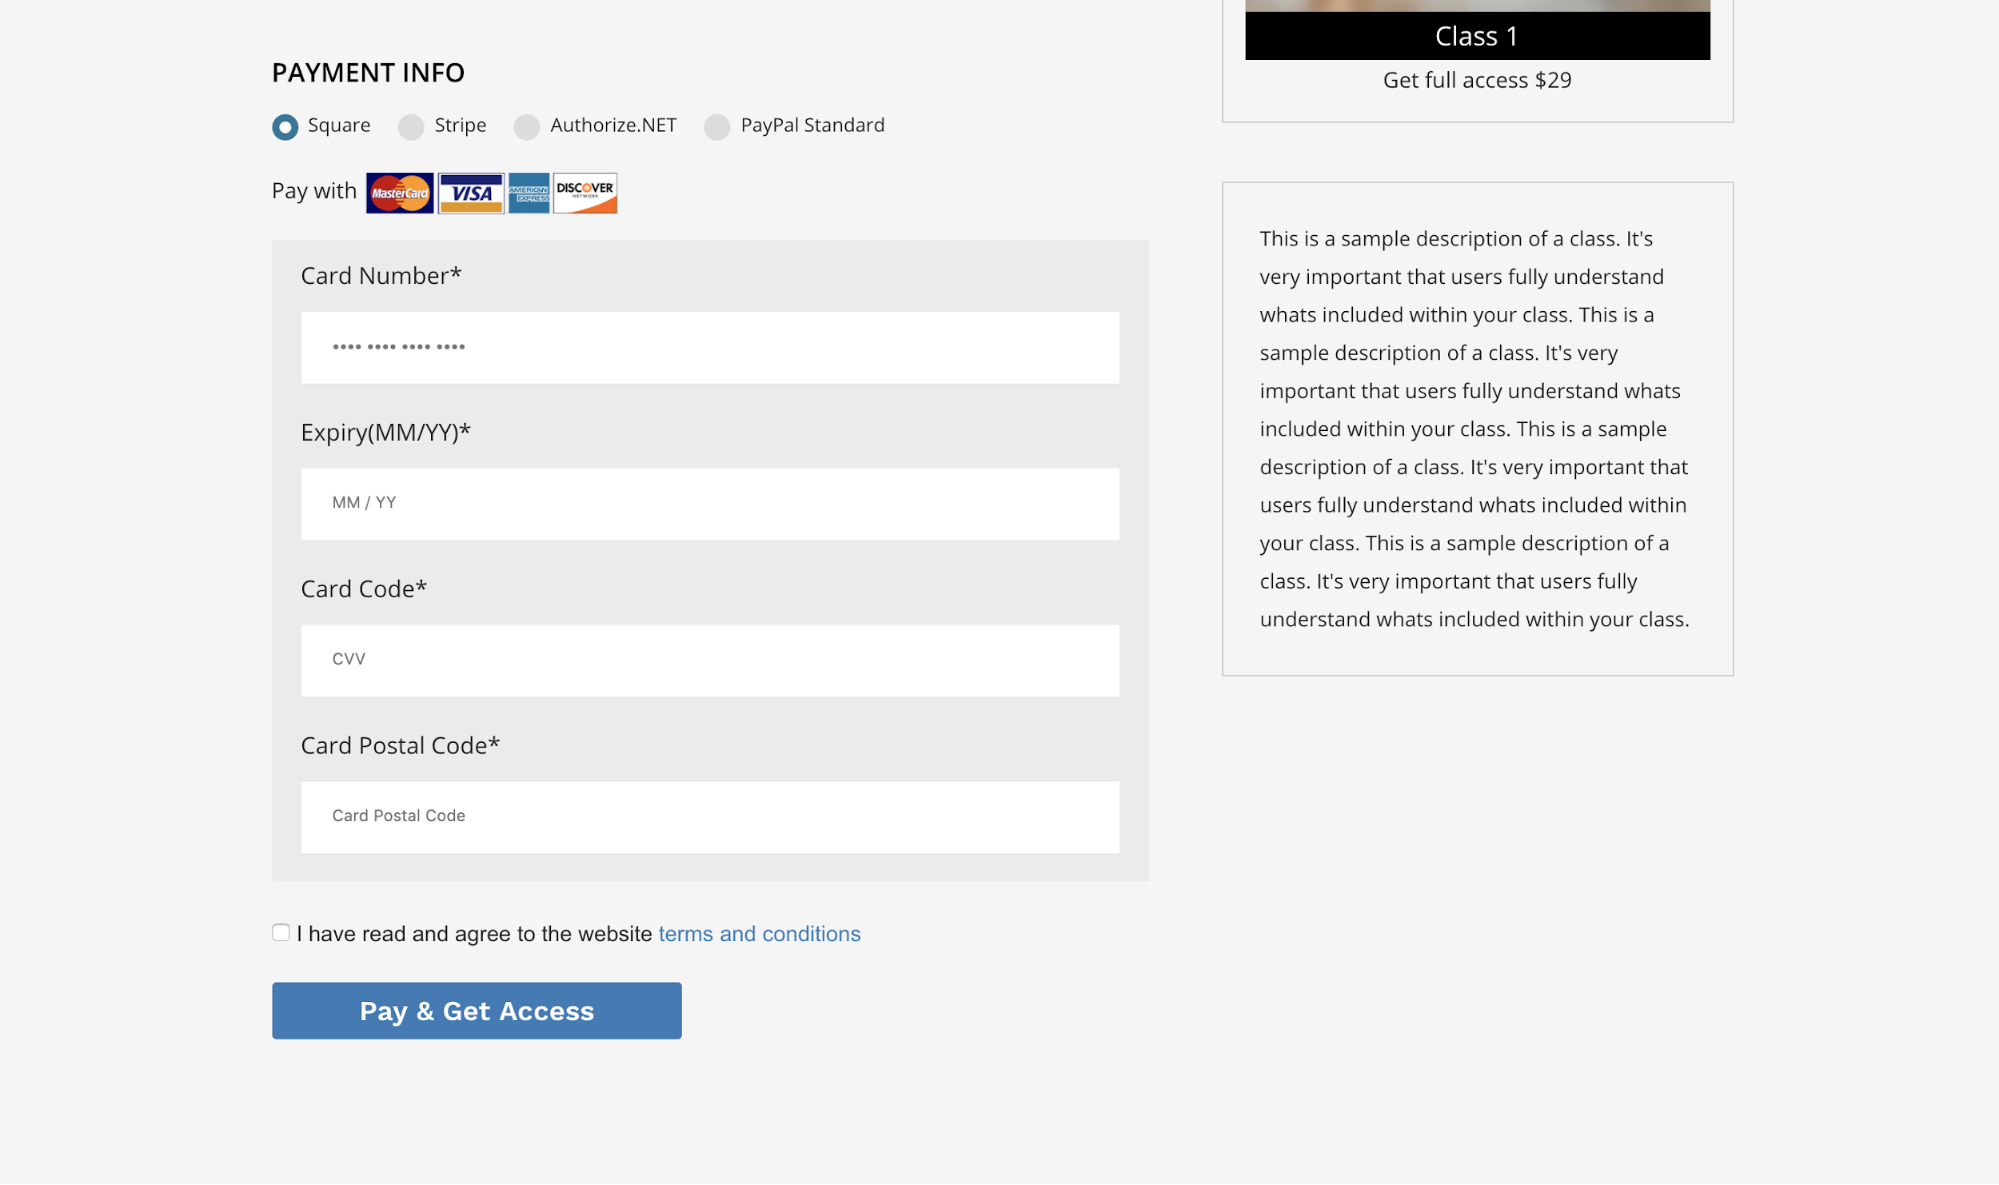
You can set up the payment platforms in the general settings area which include Square, Authorize.Net, Paypal, and Stripe.The subscriptions will include only the payment Stripe portal as the mode of payment.
After checkout, the entire payment information will be available in the order admin area.

This is an example of the checkout page that will be available for the users.
1.3.2 Order Admin Side

1.4 Coupons
1.4.1 ClassMakr Coupon Features
Title – The name of the coupon.
Coupon Code – The code applicable for your coupon.
Type – There are two types of coupon applications one is the percentage and the other is a fixed discount.
Amount –Here you can fill the amount applicable for your coupon or the percentage applicable for your coupon depending on the type selected

Application – These coupons can be applied in the checkout page against the orders .
1.5 Email Customizer
1.5.1 Email Customizer Features
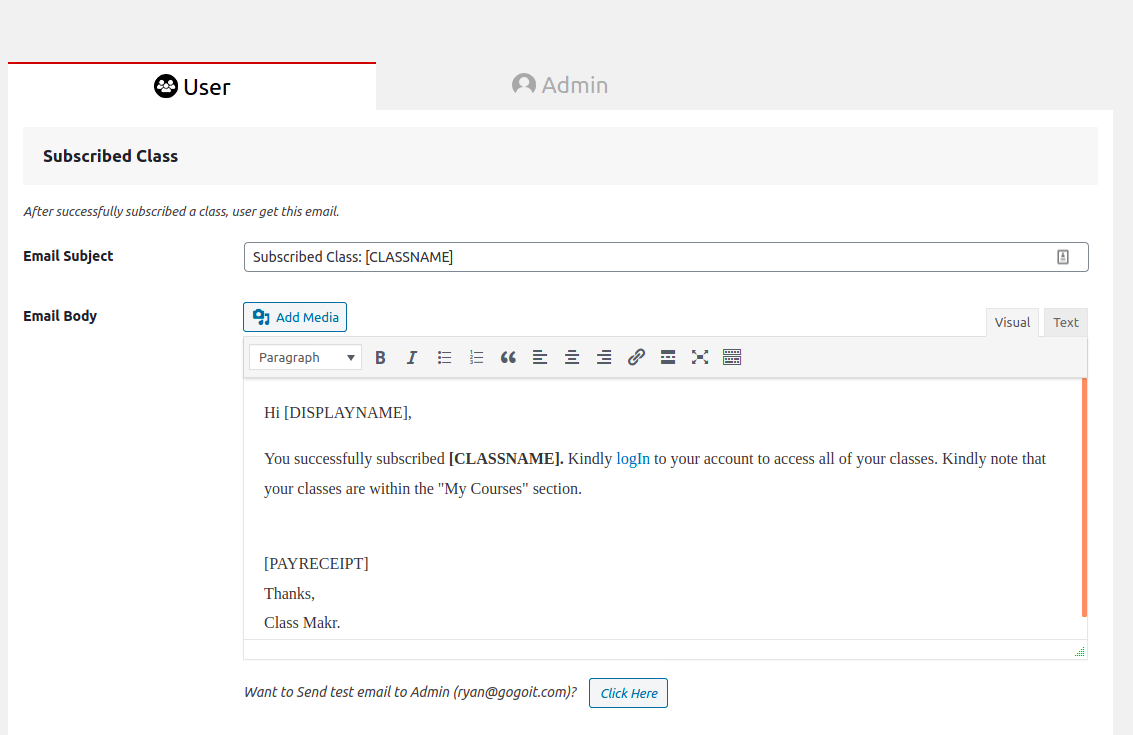
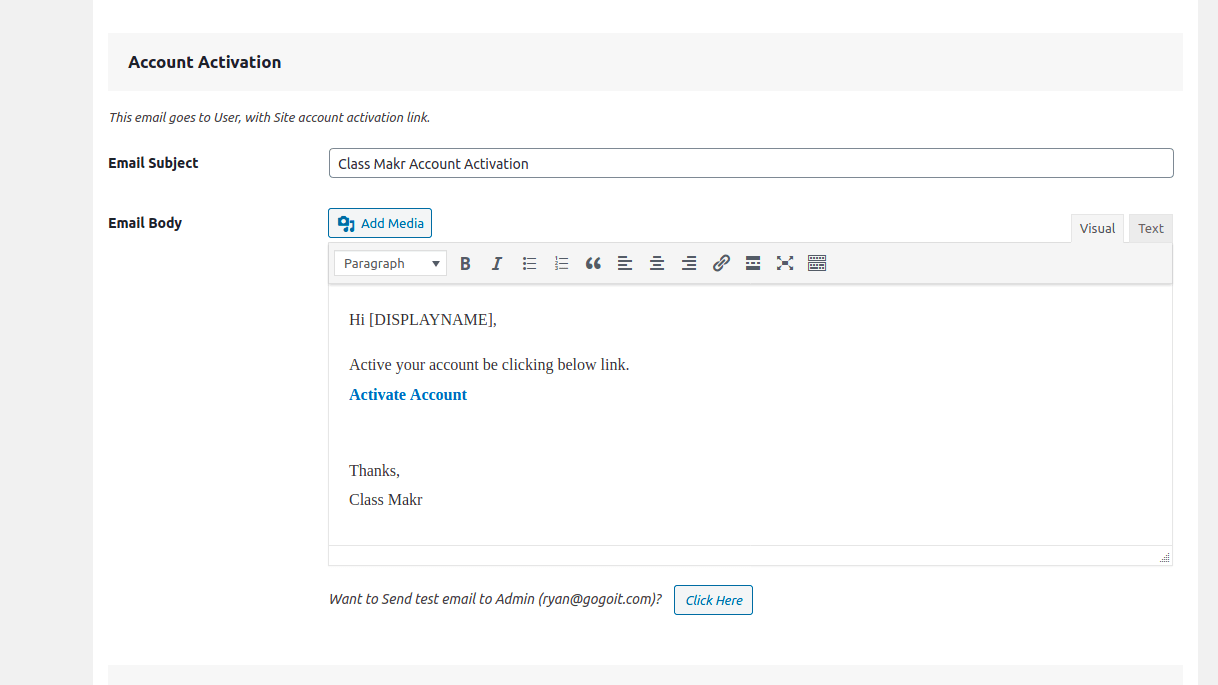
The plugin while performing its features fires certain mails such as the subscribed class mails giving the user the complete details,user account activation mail ,user account password update mail,user password reset mail ,welcome email and lastly the admin email informing them that a new class has been subscribed.So the plugin provides an area where you can go an modify the email content.You will also get a list of shortcodes for your content to make the data dynamic.

1.6 Email Campaign API
Classmakr Pro integrates with some famous email storage and campaign apps.Here is the list of the currently available apps, that you can configure with your site through ClassMakr Pro.
1.6.1 Mailchimp
Here for the mailchimp integration you will simple need to fill your credentials in the admin side and Classmakr Pro does the rest of your job.You don't have to do anything apart from that .You can simply go to your MailChimp account and later get all the user emails who have signed up on your site through Classmakr Pro.
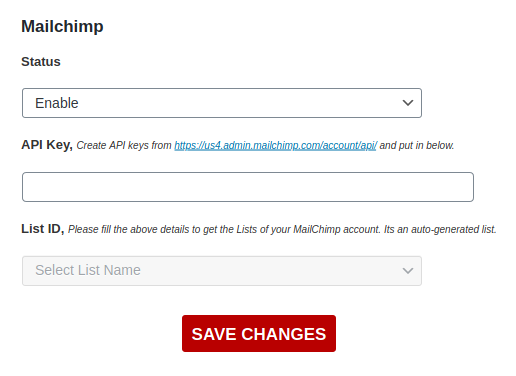
To get your Mailchimp credentils follow the given instructions below
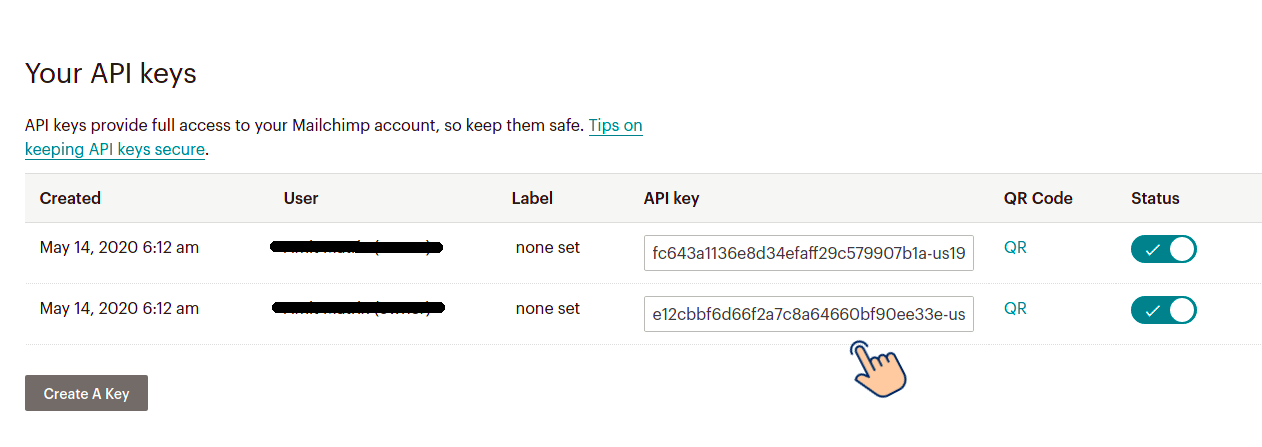
- Log in to your Mailchimp account
- Click this link to navigate to the API Keys section of your Mailchimp account: Your API Keys
- Copy an existing API key or click the Create A Key button.
- Name your key descriptively, so you know what application uses that key.
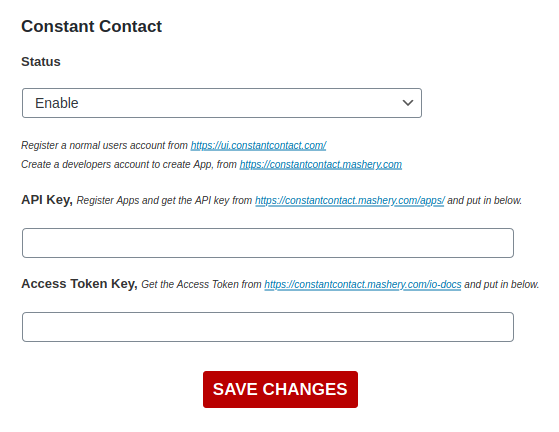
1.6.2 Constant Contact
Here for the constant contact integration you will simple need to fill your credentials in the admin side and Classmakr Pro does the rest of your job.You don't have to do anything apart from that .You can simply go to your Constant contact account and later get all the user emails who have signed up on your site through Classmakr Pro.
1.6.3 iContact
Here for the iContact integration you will simple need to fill your credentials in the admin side and Classmakr Pro does the rest of your job.You don't have to do anything apart from that .You can simply go to your iContact account and later get all the user emails who have signed up on your site through Classmakr Pro.
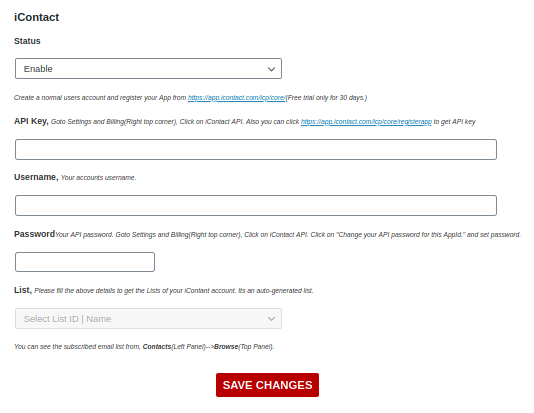
To get your iContact credentils follow the given instructions below
- Log in to your iContact account
- Go to the Username at top right
- Click on Settings and Billing

- Scroll down click on the iContact Integrations here you can configure APIs

- Scroll down click on the iContact Integrations here you can configure APIs
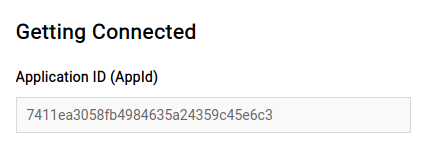
- Copy the Application Id and paste this as your Api Key
- Fill your login credentails for iContact
- The list will the become automatically available
- Select the list and you are good to go.
1.6.4 SendGrid
Here for the SendGrid integration you will simple need to fill your credentials in the admin side and Classmakr Pro does the rest of your job.You don't have to do anything apart from that .You can simply go to your SendGrid account and later get all the user emails who have signed up on your site through Classmakr Pro.
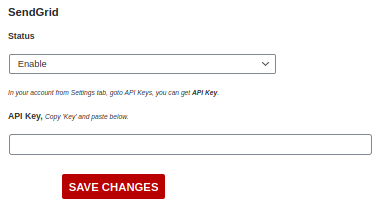
To get your Sendgrid credentils follow the given instructions below
- Log in to your Sendgrid account
- Scroll down to the Settings Option in the left menu and click on it
- A submenu will appear
- Click on the API Keys link on the submenu
- Here you will find the option to create or copy your existing API keys

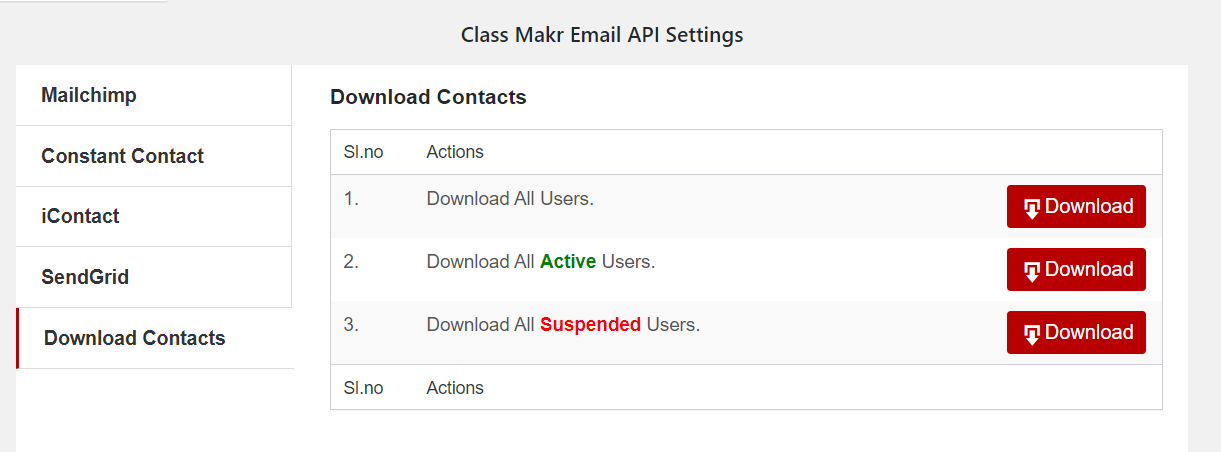
1.6.5 Download Contacts
Here you can manually download your user contacts as a CSV file..The file will contain user names and user emails and their status over the platform.You will get three options.
- Download All Users
- Download Active Users
- Download Suspended Users
1.7 General settings
The Settings module allows admins to customize some feature functionality and appearance to set the site more towards their own liking The general Settings page has multiple tabs. Each tab deals with a different set of setting options.
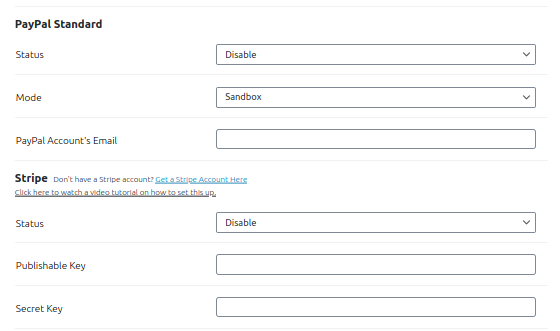
1.7.1 Payment
The Payment tabs contain all the payment integrations available with ClassMakr Pro. They include Square, Stripe,Paypal and lastly Authorize.Net.You simply have to fill up your credentials and enable them to start using them.You can use whichever you want.


1.7.2 Global
The ClassMakr Pro comes with certain global settings to give you more customization options to manage your site. For example, you can manage whether you want the next lesson top link in the lesson page or not. You can modify the layout structure as you want.

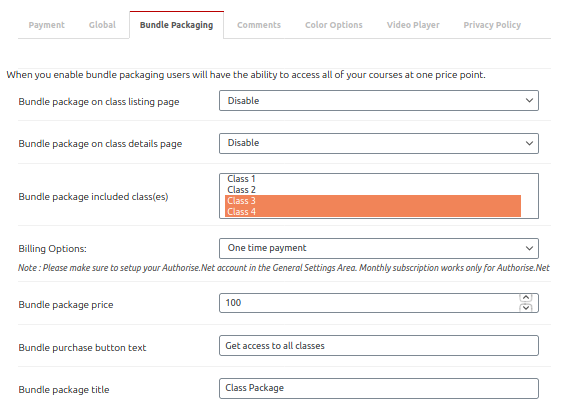
1.7.3 Bundle Packaging
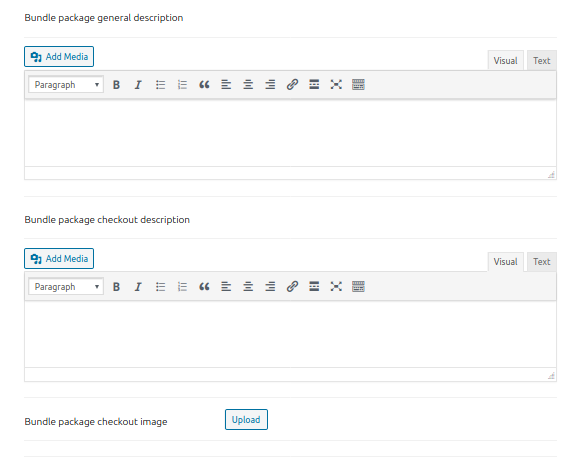
ClassMakr Pro gives an added option of selling multiple classes in a bundle. You can charge your users here as a subscription on a monthly basis, yearly basis or even as a one time payment. In order to manage this bundle, Classmakr Pro gives you a bunch of settings where you can customize you bundle just like we did with the class area. You can set up descriptions,billing options, etc.
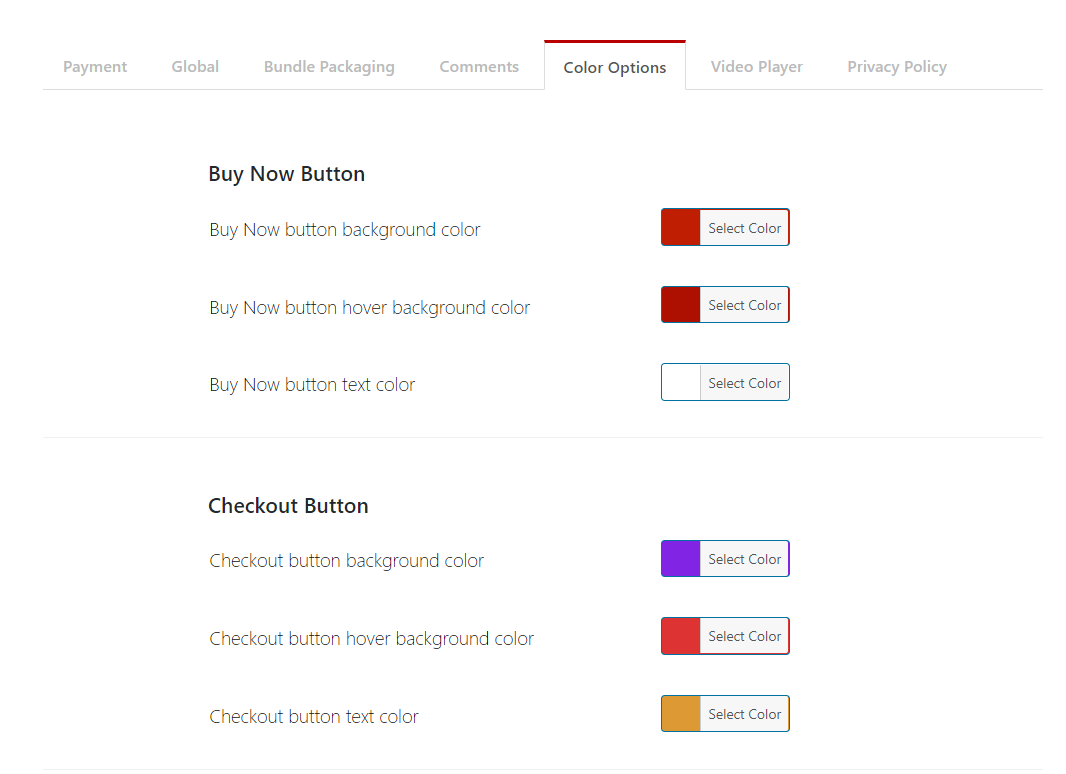
1.7.4 Color Options
ClassMakr Pro gives you customization options where you can change the lesson class element’s colors. From text color to header color to button color Classmakr Pro gives you options to customize the different elements so that they can gell together with you theme.
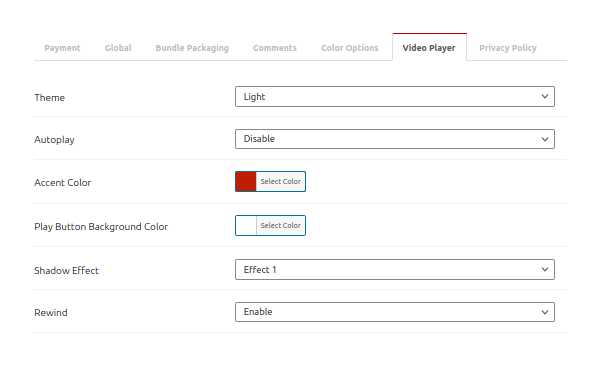
1.7.5 Video Player
ClassMakr Pro gives you customization options where you can change the video element’s colors, theme and many more settings. From the play button look to the theme you can customize it all.
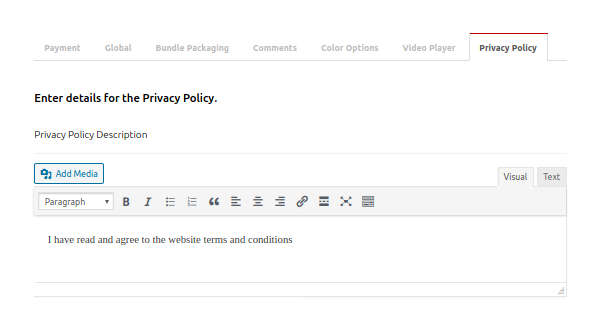
1.7.6 Privacy Policy
You can modify the privacy policy statement here for the checkout page.
1.8 Guide Book / Shortcode
The plugin comes with a bunch of shortcodes which you can use to display classes login form or registration page in any page that you want.
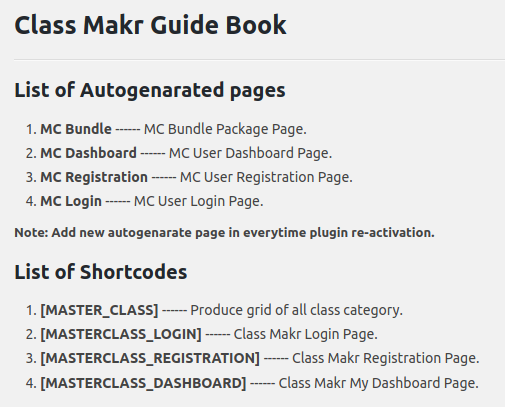
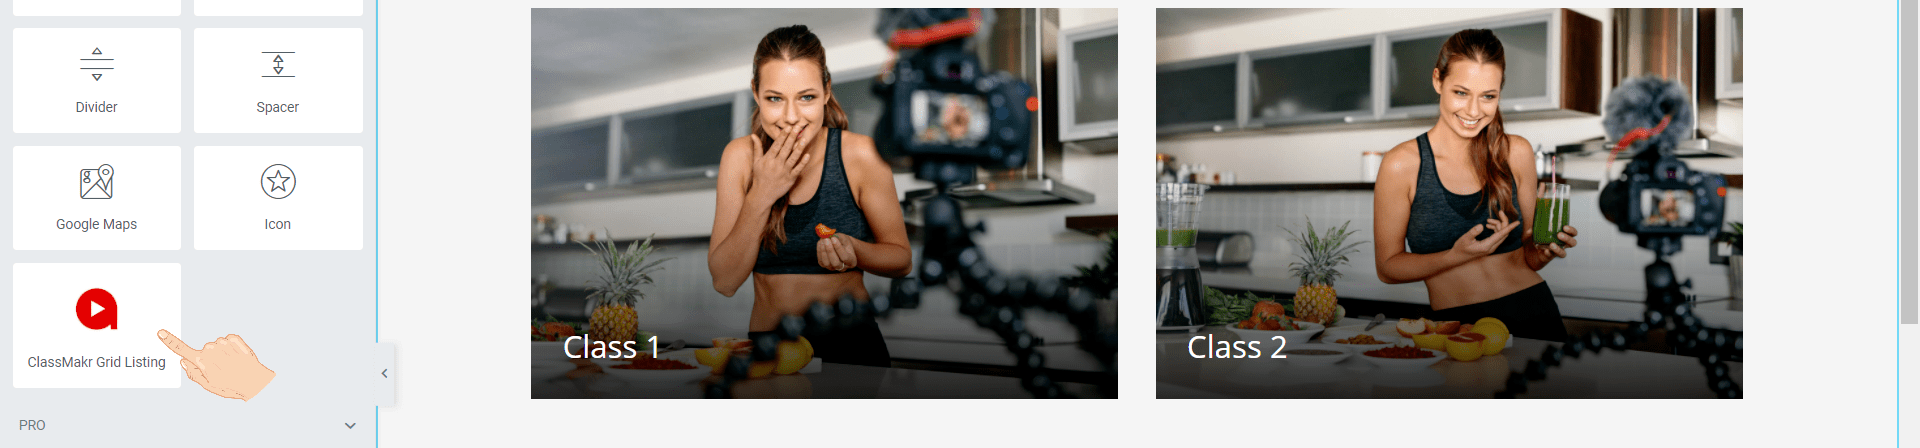
We have also added an elementor widget to help you make your work more easy.This widget helps to create a class grid view anywhere you want.You can simply drag this widget and place it in your page.